Recently, Microsoft announced a new recognition program for those contributing to the Azure community named “Azure Heroes”. Which they describe as “A new and fun way to earn digital collectibles for meaningful impact in the technical community.”
Built via collaboration with Enjin, Azure Heroes is a blockchain based recognition program. There are several categories that have been created and are represented by digital “badgers”. These are tokenised into a digital asset on the Ethereum public blockchain.
Microsoft Ignite is the big tech conference every year for Azure fans. However, it’s always in the USA and as it’s a full week long it can be a challenge for many people to travel.
Thankfully, Microsoft introduced a touring version of the conference in 2018 and has continued it through this year.
Ignite the Tour kicks off in London today and runs until tomorrow evening. It should be an excellent event with many MVP and Microsoft FTE peeps presenting great sessions.
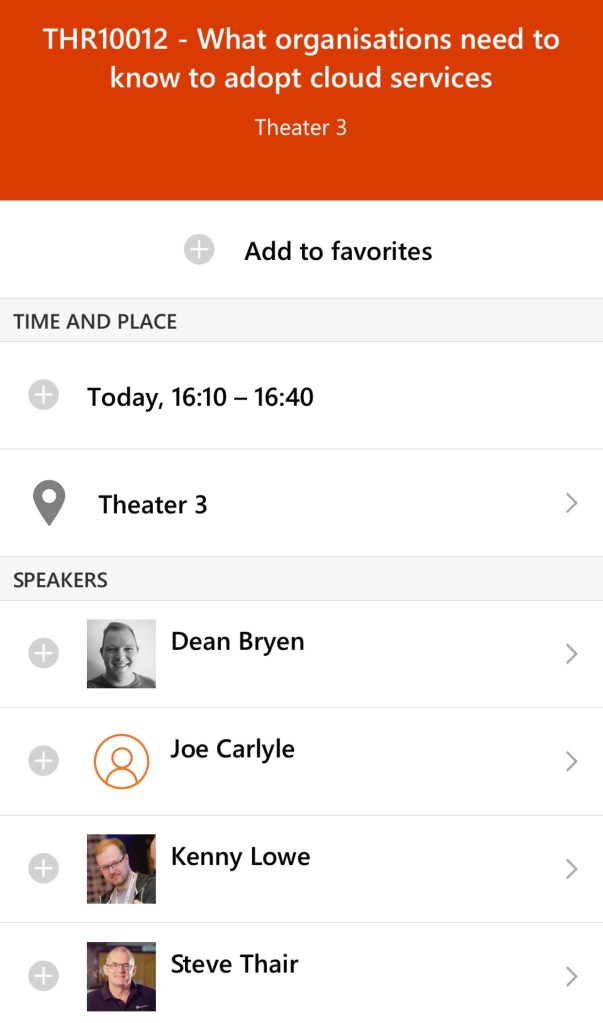
If you’re attending, I’m on a panel with some excellent and intelligent people discussing Cloud Adoption, please come and check it out! You can find it with code – THR10012
During a couple of recent client engagements, I realised there are still quite a few people using Azure Classic Resources. The simple reason for this is that they work and we all know in IT, if it ain’t broke…etc.
Now, if you only recently began working with Azure, you may never have even seen a Classic Resource. The change to Azure Resource Manager (ARM) started back in 2016. Classic Resources do have some similar objects now that they are fully in the “new” portal (yes there was an old portal, it was…odd) but the concepts are different. This is because the focus was on services, hence it being referred to as Azure Service Management (ASM). Now, Azure is focused on resources, therefore Azure Resource Manager (ARM).
ASM Example
So if you discover, or own some classic resources and would like to move them to ARM, hopefully this blog post will help you make a start.
First, do you need to migrate away from ASM? So far, Microsoft has said no, they’re “not deprecating ASM in the near future”. However, if you note the use of “near” that could mean that as the Azure Roadmap progresses, ASM is eventually deemed redundant.
The other reason for a migration may be that you want to avail of some of the features only supported in ARM or want to gain greater granular control of your individual resources. Whatever your reason, the approach is the same:
Plan
Validate
Prepare
Migrate
Plan
In this stage, you need to understand and most likely document all of the resources in scope for the migration. Once you have this, you can compare and contrast to options supported and changes required for migration to be successful. The following resources are supported for migration:
Virtual Machines
Availability Sets
Cloud Services with Virtual Machines
Storage Accounts
Virtual Networks
VPN Gateways
Express Route Gateways (in the same subscription as Virtual Network only)
Network Security Groups
Route Tables
Reserved IPs
The list for currently unsupported features is here.
While the migration operation for the most part takes place in the management plane, and there is therefore no downtime, you could proceed with a migration without impact to your users. However, I’d recommend either completing the migration out of business hours or planning a maintenance window to account for any unforeseen issues. I’d always rather have the window and not need it than the opposite!
It’s also important at this point to understand the order resources should be moved too. Microsoft have this flowchart, the lines are bit confusing but it’s accurate.
The most important point to take from the above is that if your VMs are all in the same vnet, well then you migrate the vnet, it will bring all dependent resources with it. Then your next step is any storage accounts.
Validate
Microsoft have provided a helpful validation operation within the portal and via Poweshell. This will give you a very quick look into your resources and their config to see if it’s compatible with a migration or not. However, it can not take into account all unsupported features, such as an issue on the ARM side, so ensure you complete your own checks!
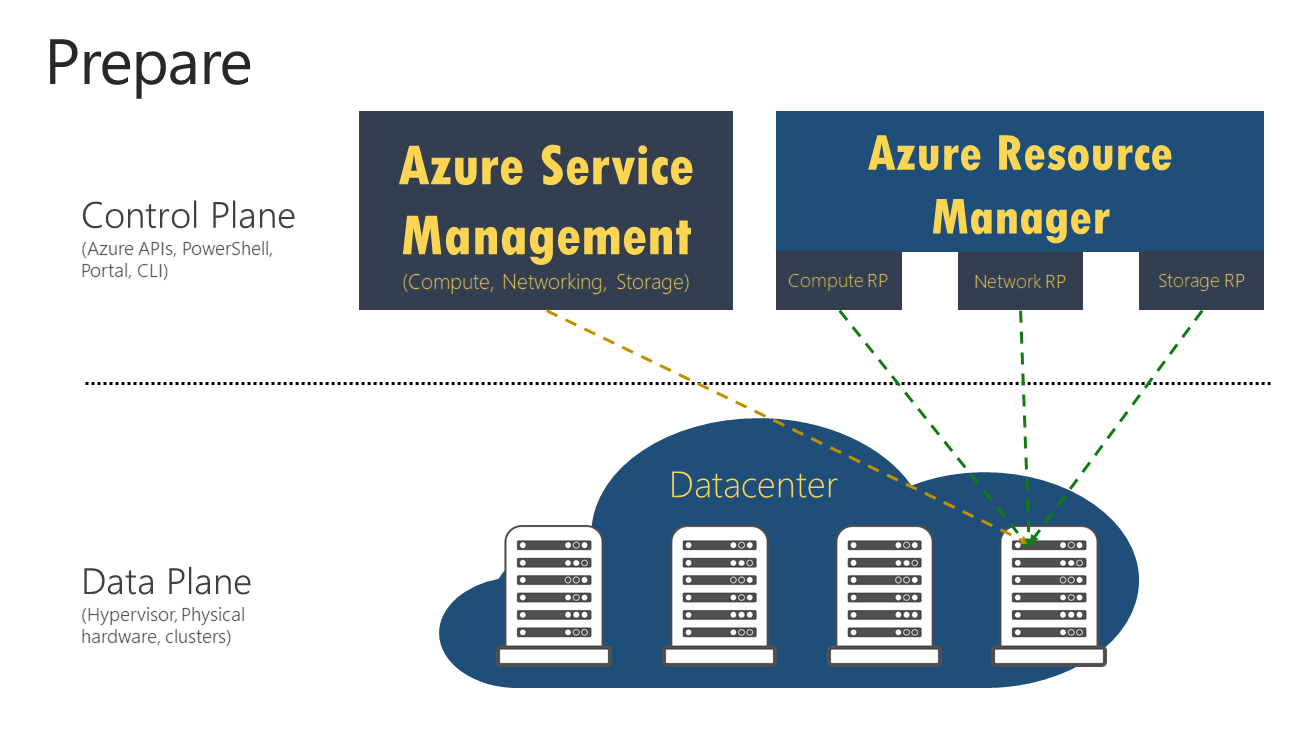
Prepare
This is a key phase. The migration process occurs on the control plane, the data plane is unaffected at all times. The preparation operation allows you to create the ARM metadata while leaving your current ASM resources in place. This is represented in the graphic below:
Once the operation begins, the management plane is locked for the duration. This means you cannot make any changes to your resources. However, your users are unaffected. With one exception, if your VM is not in a vnet ( I know, crazy in ARM!) it will be stopped and started during Prepare.
If Prepare is successful, you can continue with the migration or, abort and fix any issues. The operation creates a non-editable Resource Group for each Cloud Service, copying the name and appending “-Migrated”. Nice and neat, relatively low impact and risk. Exactly what is useful during a migration! Remember, the management plane is locked, so if all is OK complete the migration to unlock. If not, abort to unlock.
Migrate
Once you’re good to go, the last step is to migrate. Again, this is only a control plane change. The operation is idempotent, so if it fails it can be retried. However, once complete you cannot rollback. Once complete, you will now be in the state represented below:
The Classic Resources are removed and only the ARM versions remain. As the models are different certain services and aspects are renamed or incorporated in a different way, a full list of these mappings is here and is very useful during the Prepare phase and for future use once migrated.
For most people, the Azure Portal is their first experience of Azure. And for the majority, it may be their only experience. Or for a subset, at least their primary method. In my opinion, there are two reasons for this:
People love a GUI
You can do quite a lot of work without needing alternative methods of access/deployment
Neither of these reasons could be considered good or bad, this isn’t a comment on peoples working habits! I firmly believe that you should use the tool that works for you.
For example, if you’re very comfortable with using a command-line, that may be your choice for Azure. Also, there are some more complex operations that are only available via command-line options so you may need to dip in for that. However, don’t let a dip-in for a couple of operations fool you into thinking you need to work differently.
In my opinion, the Azure portal is great. I obviously use it every day for many different environments. Regardless of how complex my deployment requirements are I still always have access to the Portal for that job. I work best visually and this is what suits me. So, if you’re like me, hopefully this post will help with some tips, dos & don’ts, and general time saving advice for when you’re using the Portal.
Search Bar
First up, I’m going to start with the feature that has saved me the most time over the last year and that is the search bar.
This magic little bar should be your go to location for finding and accessing Azure resources. It is lightning quick and returns results from multiple locations, including Docs. Notice the keyboard shortcut in the screengrab above? Yep, press those two keys on your keyboard and start typing. That easy.
Search across all aspects available
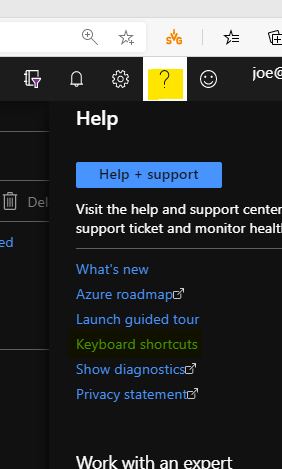
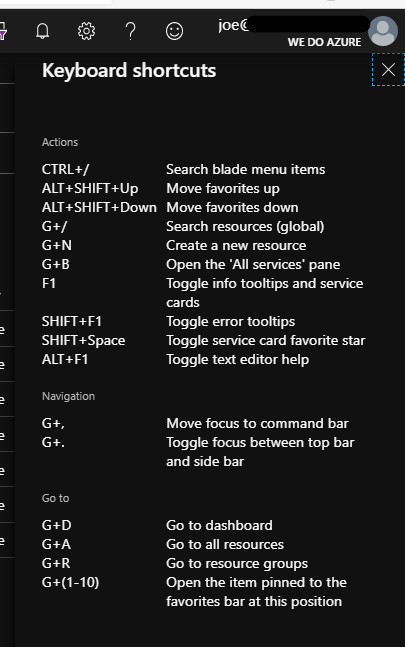
Keyboard Shortcuts
Speaking of keyboard shortcuts, you can access the full list via the top bar and the help section
Here you get a list of available shortcuts, my personal favourite being G+R
Organisation
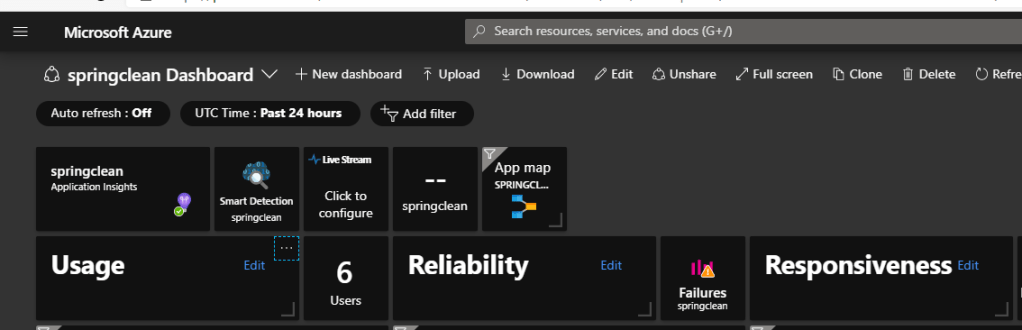
Next up, make sure the Portal is organised to help you work how you work. There are a couple of visual options like themes, but the functional ones are important. So the original landing view was the Dashboard option as below
Personally, I was never a big fan of this, I much prefer the new Home option:
But what’s important here is you have the choice. Work with both, choose which one suits you and stick with it. You set your default using the settings cog in the top bar.
Your next section that will really help day-to-day is the side bar. Again, the default here has changed recently, in the past it used to have a consistent docked list of favourites
This has now changed to a Flyout menu, which means this list is hidden unless you click to open it. This gives you more usable screen but obviously adds a step each time you want to use the side bar.
Speaking of the side bar, it comes with a default list of favourites. Spend some time removing those you don’t need and adding those you are constantly going back to. For me, my favourites list is different in every tenant as I work with multiple customers and each environment is unique. And remember, if you don’t like or use the sidebar, set it to Flyout in the settings cog and forget about it!
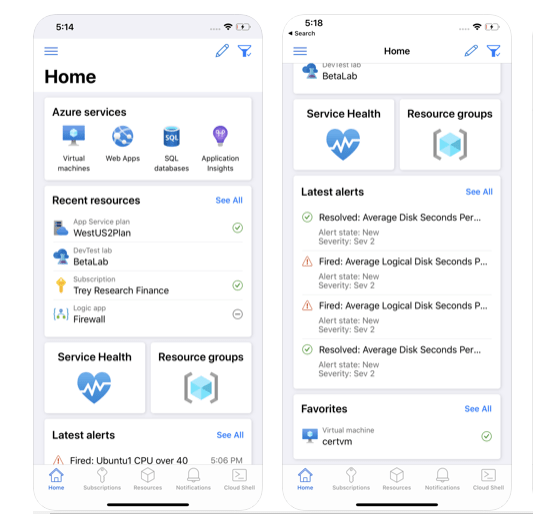
Portal App
A slightly different way of looking at it, but if you like the Portal, you can get access to a lot of features on your mobile phone via the App on Android and iOS. I’ve found the app to be surprisingly useful when out and about and need to confirm/change something quickly.
iOS App Screenshots from the store
Hopefully you’ve found something useful in this post. If you have any questions, or even any tips you would like added, get in touch!
Hi guys, check out my video below for day 12 of this years #AzureAdventCalendar. Make sure to follow along on Twitter using the hashtag and if you haven’t already, subscribe to the Youtube channel.