

For most people, the Azure Portal is their first experience of Azure. And for the majority, it may be their only experience. Or for a subset, at least their primary method. In my opinion, there are two reasons for this:
- People love a GUI
- You can do quite a lot of work without needing alternative methods of access/deployment
Neither of these reasons could be considered good or bad, this isn’t a comment on peoples working habits! I firmly believe that you should use the tool that works for you.
For example, if you’re very comfortable with using a command-line, that may be your choice for Azure. Also, there are some more complex operations that are only available via command-line options so you may need to dip in for that. However, don’t let a dip-in for a couple of operations fool you into thinking you need to work differently.
In my opinion, the Azure portal is great. I obviously use it every day for many different environments. Regardless of how complex my deployment requirements are I still always have access to the Portal for that job. I work best visually and this is what suits me. So, if you’re like me, hopefully this post will help with some tips, dos & don’ts, and general time saving advice for when you’re using the Portal.
Search Bar
First up, I’m going to start with the feature that has saved me the most time over the last year and that is the search bar.

This magic little bar should be your go to location for finding and accessing Azure resources. It is lightning quick and returns results from multiple locations, including Docs. Notice the keyboard shortcut in the screengrab above? Yep, press those two keys on your keyboard and start typing. That easy.

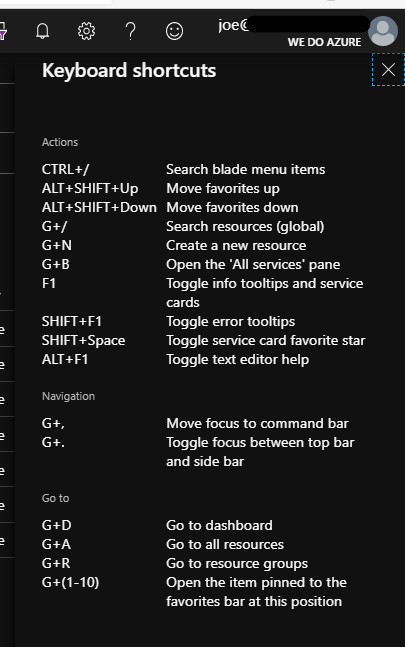
Keyboard Shortcuts
Speaking of keyboard shortcuts, you can access the full list via the top bar and the help section
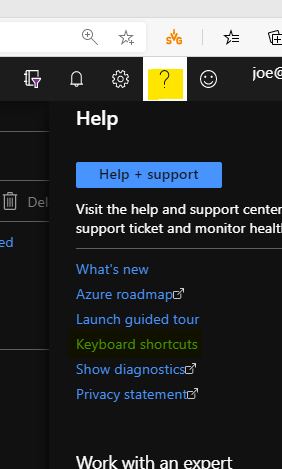
Here you get a list of available shortcuts, my personal favourite being G+R
Organisation
Next up, make sure the Portal is organised to help you work how you work. There are a couple of visual options like themes, but the functional ones are important. So the original landing view was the Dashboard option as below
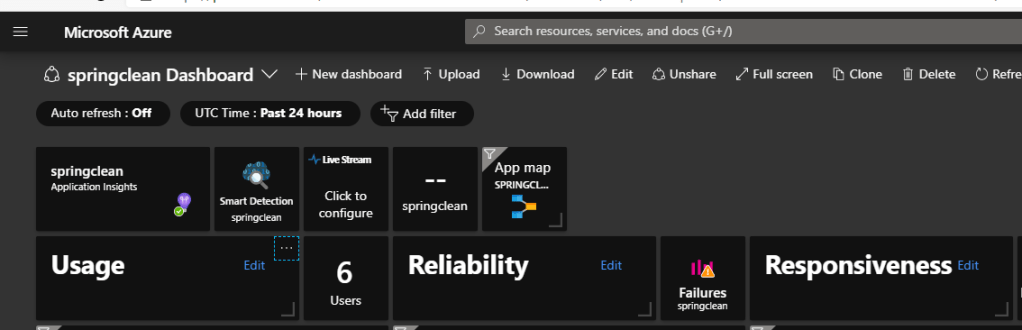
Personally, I was never a big fan of this, I much prefer the new Home option:

But what’s important here is you have the choice. Work with both, choose which one suits you and stick with it. You set your default using the settings cog in the top bar.
Your next section that will really help day-to-day is the side bar. Again, the default here has changed recently, in the past it used to have a consistent docked list of favourites

This has now changed to a Flyout menu, which means this list is hidden unless you click to open it. This gives you more usable screen but obviously adds a step each time you want to use the side bar.
Speaking of the side bar, it comes with a default list of favourites. Spend some time removing those you don’t need and adding those you are constantly going back to. For me, my favourites list is different in every tenant as I work with multiple customers and each environment is unique. And remember, if you don’t like or use the sidebar, set it to Flyout in the settings cog and forget about it!
Portal App
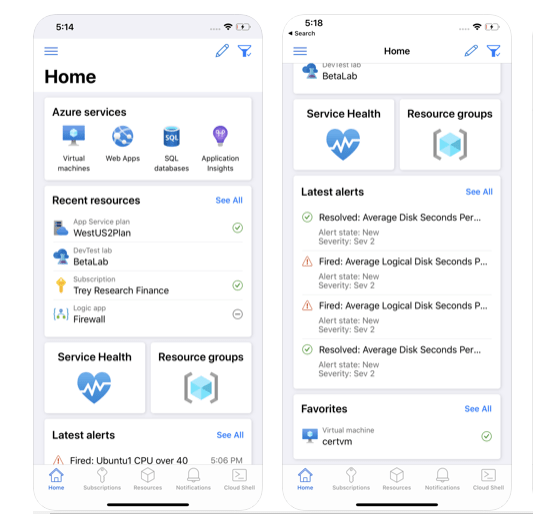
A slightly different way of looking at it, but if you like the Portal, you can get access to a lot of features on your mobile phone via the App on Android and iOS. I’ve found the app to be surprisingly useful when out and about and need to confirm/change something quickly.
Hopefully you’ve found something useful in this post. If you have any questions, or even any tips you would like added, get in touch!
