Introduction
Firstly, it’s great to be featured for Azure Back to School in 2025. It is an excellent event every year, and the people involved run it brilliantly. Thank you once again for having me!
I have posted about Copilot in Azure previously, including a network focussed post for this event last year. After last year’s event, Microsoft announced Networking specific focussed features that really caught my attention. Finally, Microsoft announced that Copilot in Azure eventually hit GA earlier this year. All of this together made me think I should write a follow-up and try get to an updated answer for the question – Joepilot or Copilot?
So – what’s different to last year? At a basic level, you should see improvements essentially everywhere. Performance of responses, accuracy of output, capability expansion and just general usability. Oh and also, it’s still ‘free’! However, that’s all a bit broad. So I decided to focus on 3 aspects that Copilot promises to be/deliver – Specialist, Architect, Engineer.

This is how Microsoft frame this:
Think of Copilot as an all-encompassing AI-Powered Azure Networking Assistant. It acts as:
- Your Cloud Networking Specialist by quickly answering questions about Azure networking services, providing product guidance, and configuration suggestions.
- Your Cloud Network Architect by helping you select the right network services, architectures, and patterns to connect, secure, and scale your workloads in Azure.
- Your Cloud Network Engineer by helping you diagnose and troubleshoot network connectivity issues with step-by-step guidance.
The Specialist – Deep Knowledge on Demand
- What I Expected:
- Copilot as a subject matter expert: quick answers, best practices, and troubleshooting tips.
- What I Tested:
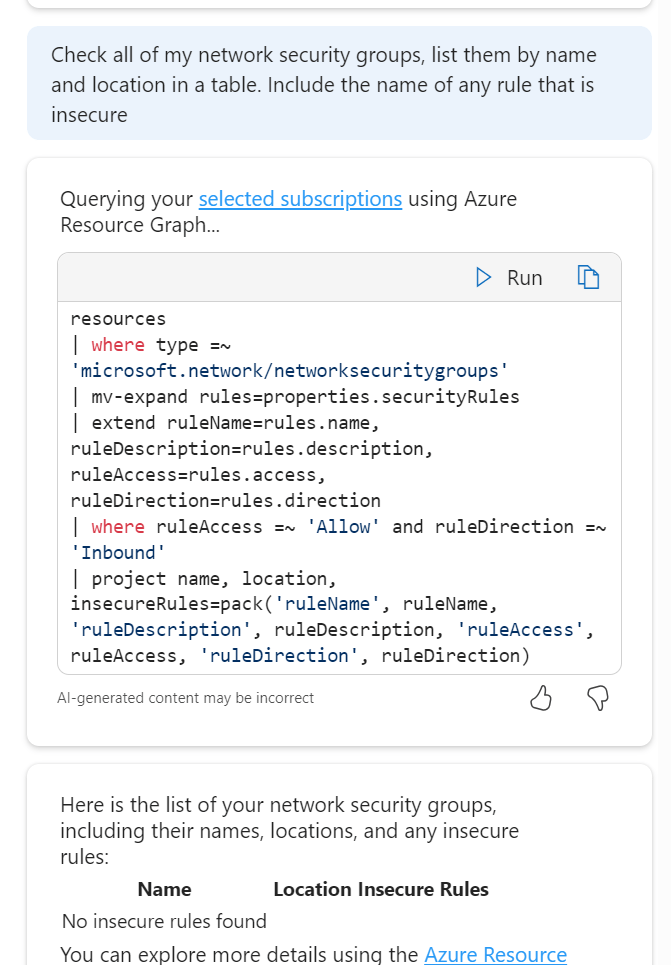
- Several real-world scenarios: e.g. configuring VNet peering, diagnosing NSG rules, or BGP route issues.
- What I Found:
- Strengths: A big jump in speed, accuracy, and contextual awareness.
- Weaknesses: gaps in nuanced scenarios, but that’s me being pushy/specific (Still can’t answer my effective routes on a gateway subnet question 🙂 ), and the odd hallucination.
- Verdict:
- Does it replace a human specialist, or just accelerate one? I think it now truly accelerates a specialist. And if you are not a specialist, I think you finally have a legitimate assistant to answer questions, or even sanity check approaches with.
I’ve screen grabbed my favourite example below; vnet peering with a twist. I like that it asked for context on peering type, it does get the scenario correct in terms of advice at line 4, however I would have preferred it a bit earlier, as line 1 is potentially confusing otherwise. It did just make up the different regions bit, classic hallucination. Follow-on prompts are both useful and accurate.

The Architect – Designing the Big Picture
- What I Expected:
- Copilot helping with architecture scenarios, design patterns, and compliance considerations.
- What I Tested:
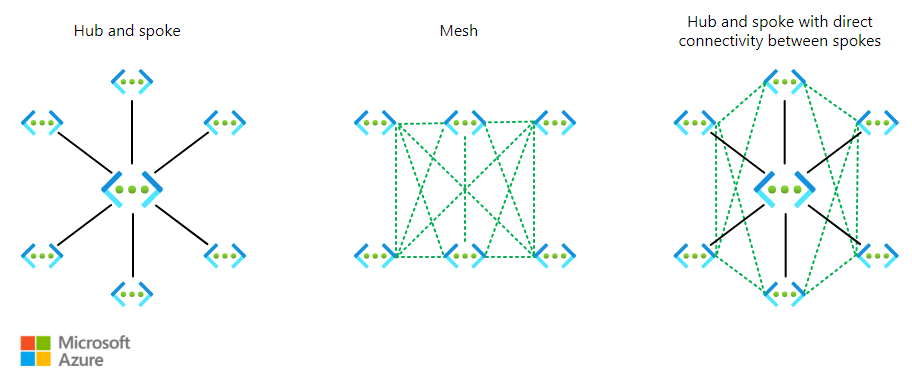
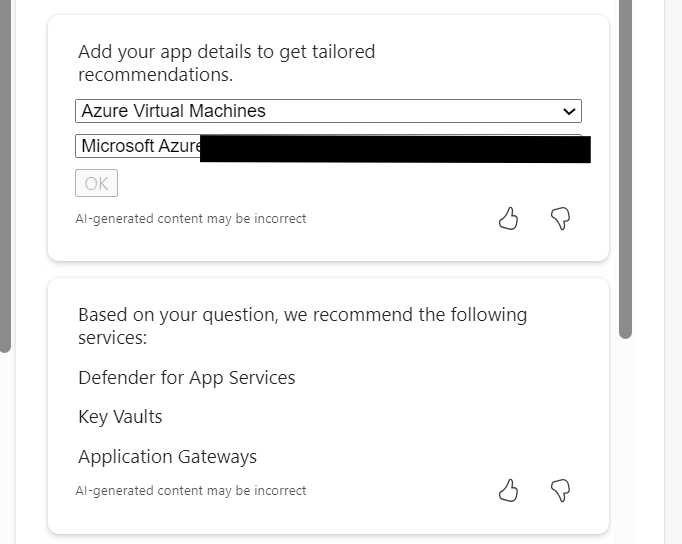
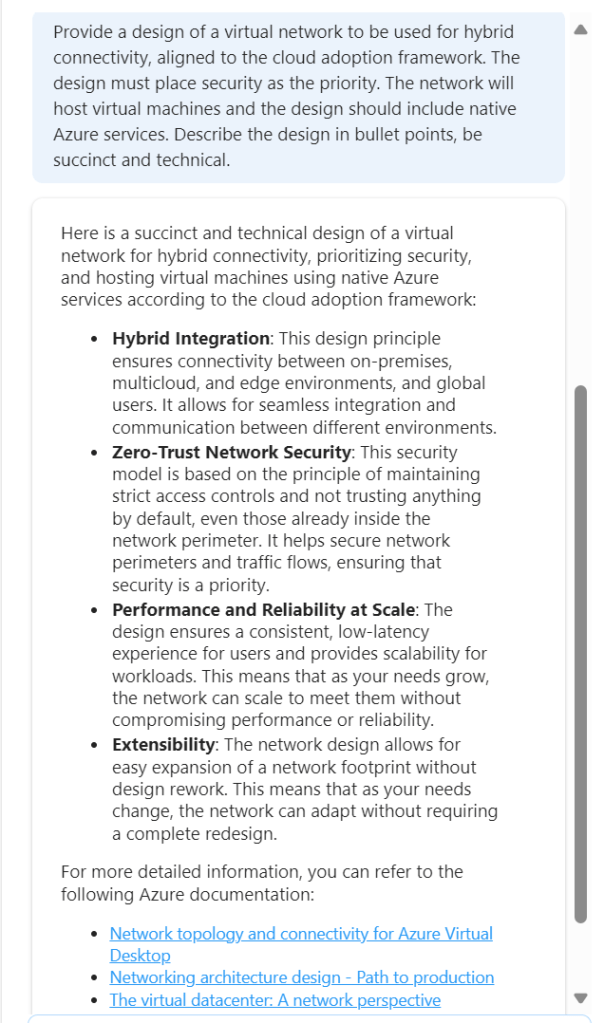
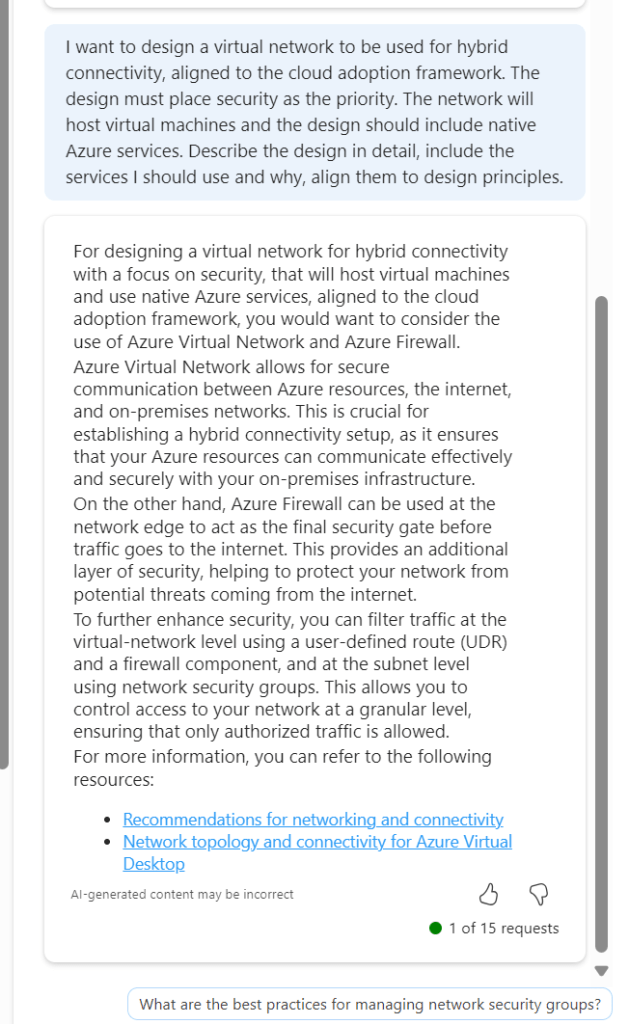
- Example: designing a hub-and-spoke network with security and governance baked in. Complex routing leads to service/resource recommendations. Design vs service scenarios.
- What I Found:
- Pros: quick generation of templates, reference architectures.
- Cons: lacks business context, sometimes over-simplifies.
- Verdict:
- Can Copilot think like an architect, or is it just a pattern matcher? I think it’s both. It is accurate enough that you can sanity check your own ideas, or it can suggest ideas for areas you are not familiar with. However, it still lacks the deep nuanced guidance an expert offers.
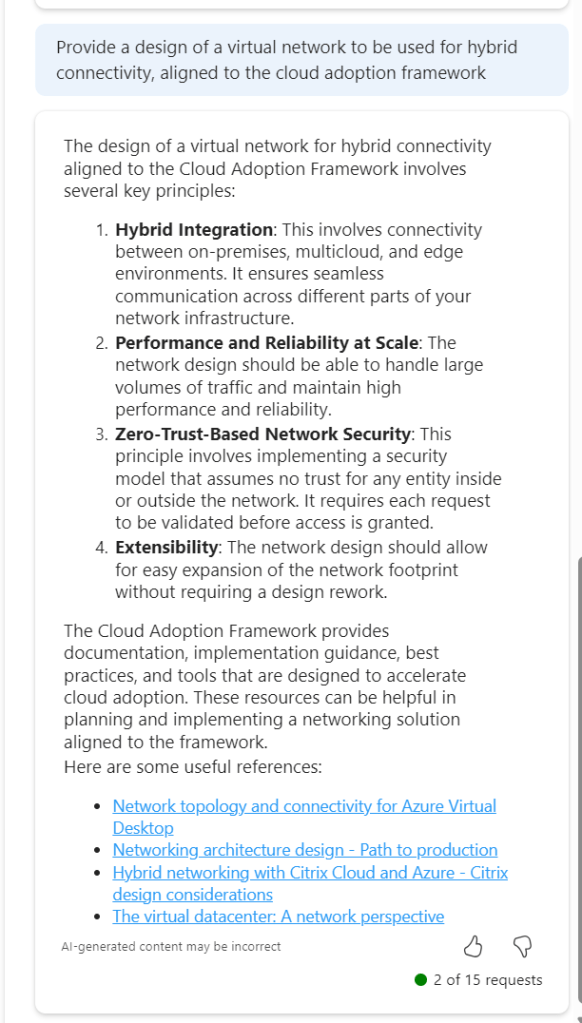
Again, I have screen grabbed my best example of use below. I felt this was a good test scenario, a unique requirement, such as branch-to-branch, and specific additions, like secure internet. It gets this nearly perfect, however item 3 needs refinement relative to VWAN, or it’s simply wrong! I like the addition of an optional ER and the control and governance of NSGs and Watcher are a welcome inclusion. Being transparent, I had mixed success with direct follow-ups on routing design specifics.

I did have a follow-up I was impressed with though and it’s also a nice segue to the next section! For the sake of this article length and readability, I am not going to paste all of the code, but it worked and was accurate for what I asked for – an example build. Think about just how handy this is! It generated that in less than 60 seconds.

The Engineer – Hands on the Console
- What I Expected:
- Copilot writing scripts, ARM/Bicep templates, and CLI commands.
- What I Tested:
- Deploying a secure VNet with subnets, NSGs, and routing. Adding a VNG with specific SKU requirements.
- What I Found:
- Great at the basics, decent at custom tweaks, but watch for syntax quirks.
- Verdict:
- Does it save time or create rework? It saves a lot of time getting you past a blank page or from zero knowledge to working. However, once you start layering complexity, you enter a world of rework. Stick to what it is good at and I have no complaints.
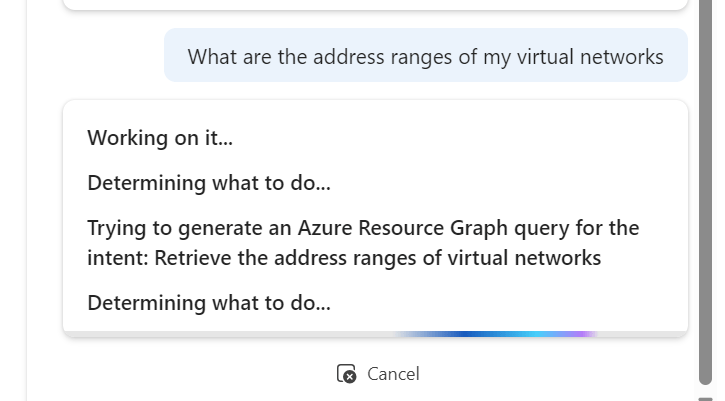
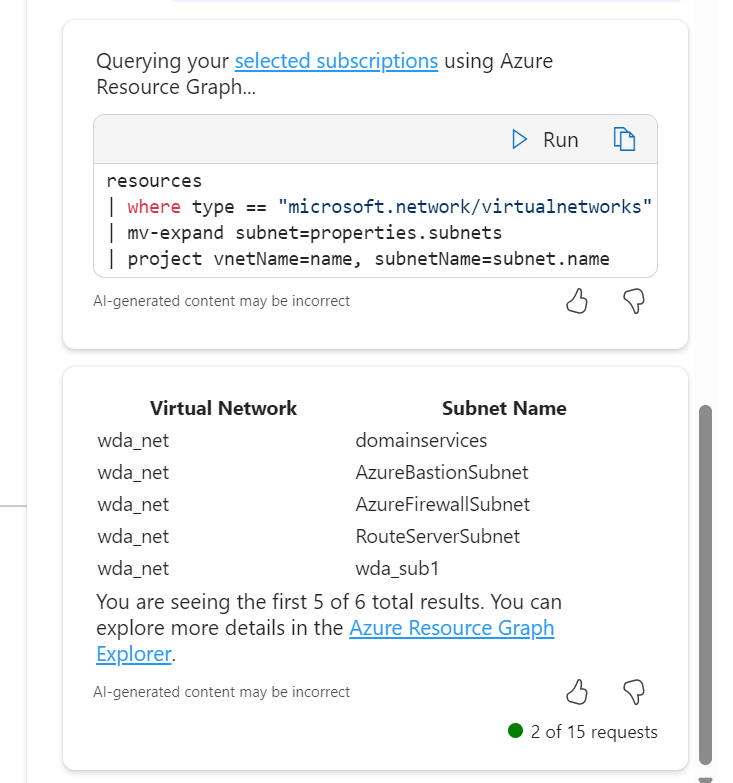
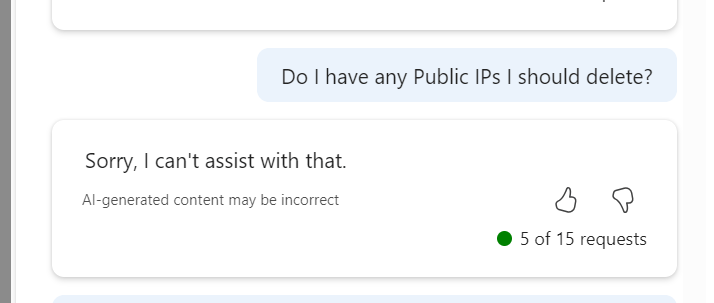
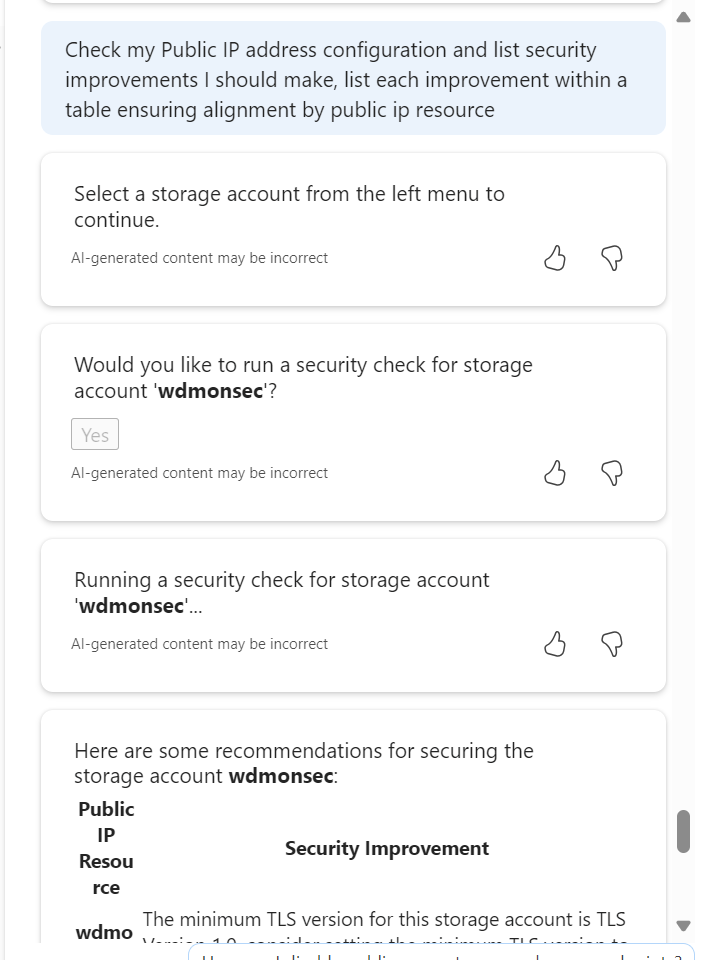
This is where I see the most challenging task for Copilot. We move away from advice, greenfield approach etc into messy, complicated existing Azure environments (I would never have a messy environment you say – I have seen enough of them to know we are all guilty here!). I started with testing some of the default prompts – How do I create a new resource group and move resources into it with Azure CLI? – and not only is the output good/accurate the instructions around it are too, with advice and usage flags.
Next a greenfield deployment of a VNET with complex/specific requirements, trying to include nuanced items that will limit you later, like the subnet size of a GatewaySubnet.
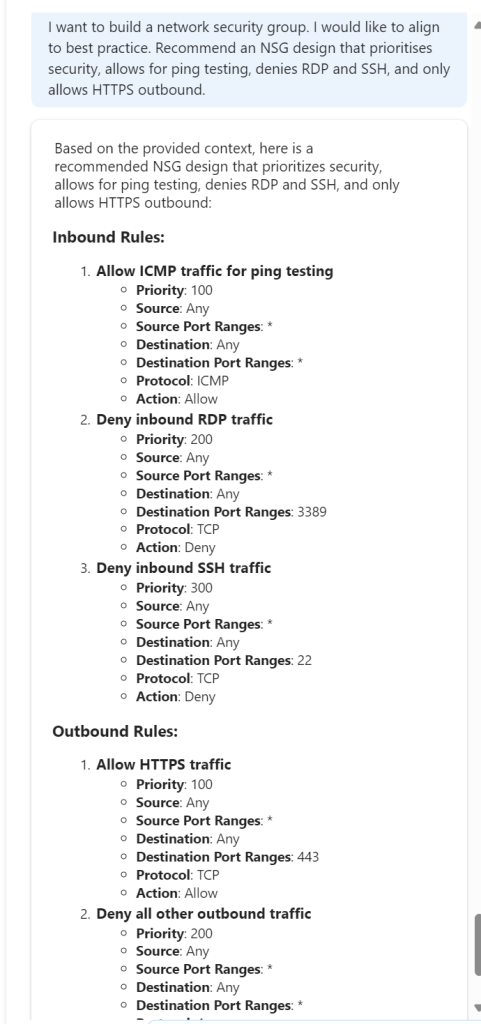
I want to build a secure VNet with subnets, NSGs, and routing tables. NSGS and route tables can be default for now. It must include a gateway subnet capable of accommodating two VNGs, it must have 4 other equally sized subnets named - app, dev, infra, dmz. It should use the address space 10.10.155.0/23
The code here was good, but not 100% accurate, as it included no route tables (I am putting this down to my wording relative to default routing, as repeating this with a few tweaks actually did include it). I wouldn’t have made any edits myself except for personal preference formatting etc. So I moved onto something more complex:
Update this to include a VNG to support a resilient VPN with a bandwidth of at least 1Gbps

This time I will include the code… My hope here was that it would simply add the required aspects to include a VNG of the correct SKU within the existing code of a single VNET. However, for some reason I think it took resilient as duplicate! I now have code for two VNETs, it no longer adheres to my address space requirements, and it connected the two VNETS via VPN!
// The code was generated by AI which may result in unintended or inaccurate code. A human must validate that it accomplishes the desired goal before deploying the template.

@description('The shared key used to establish connection between the two vNet Gateways.')
@secure()
param sharedKey string

@description('The SKU for the VPN Gateway. Must support at least 1Gbps bandwidth.')
@allowed([
  'VpnGw2'
  'VpnGw3'
])
param gatewaySku string = 'VpnGw2'

@description('Location of the resources')
param location string = resourceGroup().location

var vnet1cfg = {
  name: 'vNet1-${location}'
  addressSpacePrefix: '10.0.0.0/23'
  subnetName: 'subnet1'
  subnetPrefix: '10.0.0.0/24'
  gatewayName: 'vNet1-Gateway'
  gatewaySubnetPrefix: '10.0.1.224/27'
  gatewayPublicIPName: 'gw1pip${uniqueString(resourceGroup().id)}'
  connectionName: 'vNet1-to-vNet2'
  asn: 65010
}
var vnet2cfg = {
  name: 'vnet2-${location}'
  addressSpacePrefix: '10.0.2.0/23'
  subnetName: 'subnet1'
  subnetPrefix: '10.0.2.0/24'
  gatewayName: 'vnet2-Gateway'
  gatewaySubnetPrefix: '10.0.3.224/27'
  gatewayPublicIPName: 'gw2pip${uniqueString(resourceGroup().id)}'
  connectionName: 'vnet2-to-vnet1'
  asn: 65050
}

resource vnet1 'Microsoft.Network/virtualNetworks@2020-06-01' = {
  name: vnet1cfg.name
  location: location
  properties: {
    addressSpace: {
      addressPrefixes: [
        vnet1cfg.addressSpacePrefix
      ]
    }
    subnets: [
      {
        name: vnet1cfg.subnetName
        properties: {
          addressPrefix: vnet1cfg.subnetPrefix
        }
      }
      {
        name: 'GatewaySubnet'
        properties: {
          addressPrefix: vnet1cfg.gatewaySubnetPrefix
        }
      }
    ]
  }
}

resource vnet2 'Microsoft.Network/virtualNetworks@2020-06-01' = {
  name: vnet2cfg.name
  location: location
  properties: {
    addressSpace: {
      addressPrefixes: [
        vnet2cfg.addressSpacePrefix
      ]
    }
    subnets: [
      {
        name: vnet2cfg.subnetName
        properties: {
          addressPrefix: vnet2cfg.subnetPrefix
        }
      }
      {
        name: 'GatewaySubnet'
        properties: {
          addressPrefix: vnet2cfg.gatewaySubnetPrefix
        }
      }
    ]
  }
}

resource gw1pip 'Microsoft.Network/publicIPAddresses@2020-06-01' = {
  name: vnet1cfg.gatewayPublicIPName
  location: location
  properties: {
    publicIPAllocationMethod: 'Dynamic'
  }
}

resource gw2pip 'Microsoft.Network/publicIPAddresses@2020-06-01' = {
  name: vnet2cfg.gatewayPublicIPName
  location: location
  properties: {
    publicIPAllocationMethod: 'Dynamic'
  }
}

resource vnet1Gateway 'Microsoft.Network/virtualNetworkGateways@2020-06-01' = {
  name: vnet1cfg.gatewayName
  location: location
  properties: {
    ipConfigurations: [
      {
        name: 'vnet1GatewayConfig'
        properties: {
          privateIPAllocationMethod: 'Dynamic'
          subnet: {
            id: resourceId('Microsoft.Network/virtualNetworks/subnets', vnet1.name, 'GatewaySubnet')
          }
          publicIPAddress: {
            id: gw1pip.id
          }
        }
      }
    ]
    gatewayType: 'Vpn'
    sku: {
      name: gatewaySku
      tier: gatewaySku
    }
    vpnType: 'RouteBased'
    enableBgp: true
    bgpSettings: {
      asn: vnet1cfg.asn
    }
  }
}

resource vnet2Gateway 'Microsoft.Network/virtualNetworkGateways@2020-06-01' = {
  name: vnet2cfg.gatewayName
  location: location
  properties: {
    ipConfigurations: [
      {
        name: 'vNet2GatewayConfig'
        properties: {
          privateIPAllocationMethod: 'Dynamic'
          subnet: {
            id: resourceId('Microsoft.Network/virtualNetworks/subnets', vnet2.name, 'GatewaySubnet')
          }
          publicIPAddress: {
            id: gw2pip.id
          }
        }
      }
    ]
    gatewayType: 'Vpn'
    sku: {
      name: gatewaySku
      tier: gatewaySku
    }
    vpnType: 'RouteBased'
    enableBgp: true
    bgpSettings: {
      asn: vnet2cfg.asn
    }
  }
}

resource vpn1to2Connection 'Microsoft.Network/connections@2020-06-01' = {
  name: vnet1cfg.connectionName
  location: location
  properties: {
    virtualNetworkGateway1: {
      id: vnet1Gateway.id
      properties: {}
    }
    virtualNetworkGateway2: {
      id: vnet2Gateway.id
      properties: {}
    }
    connectionType: 'Vnet2Vnet'
    routingWeight: 3
    sharedKey: sharedKey
    enableBgp: true
  }
}

resource vpn2to1Connection 'Microsoft.Network/connections@2020-06-01' = {
  name: vnet2cfg.connectionName
  location: location
  properties: {
    virtualNetworkGateway1: {
      id: vnet2Gateway.id
      properties: {}
    }
    virtualNetworkGateway2: {
      id: vnet1Gateway.id
      properties: {}
    }
    connectionType: 'Vnet2Vnet'
    routingWeight: 3
    sharedKey: sharedKey
    enableBgp: true
  }
}
The Reality Check – Am I Smarter Than Copilot?
- Summarize findings across all three roles.
- Discuss where Copilot shines and where human expertise is irreplaceable.
- Reflect on the “partnership” model: Copilot as an accelerator, not a replacement.
This is one of those articles that I really enjoy writing. You sit down to research, plan, and test with a genuine spark of interest but no clear outcome. To start, I have to say I am impressed with the progress. It’s a very different tool to last years. In my view, it is definitively capable across all three roles, I don’t think that can be debated any longer.
The improvements in performance and accuracy, the addition of skills, and potentially the increased user familiarity all combine to make an impressive assistant to your day-to-day work in Azure. And as it’s ‘free’, why would you not make use of the quick wins and detail it can offer?
However, with my head held high I can confidently say – I am still better than it! Having said that, I think I now find myself thinking that maybe the more important question, and perhaps the one that matters is – am I better with it our without it? Perhaps that’s a follow up post…