
In my opinion, one of the most interesting services to be launched this year by Microsoft was Windows Virtual Desktop (WVD). If you aren’t sure what WVD is exactly, I wrote some initial thoughts on the service here and here earlier this year. Right at the end of September, the service went GA so here is a guide on how to successfully deploy your first WVD.
So first, the things you need to start:
- Azure AD
- Domain Services via a server or Azure ADDS
- A vnet with access to Domain Services
Next, you need to understand the components of WVD that you will deploy:
- Tenants – The WVD tenant is the primary interface for managing your environment. Each tenant must be associated with the Azure Active Directory containing the users who will sign in to the environment.
- Host Pools – A collection of Azure virtual machines that register to WVD as session hosts when you run the WVD agent. All session host virtual machines in a host pool should be sourced from the same image for a consistent user experience. There are two types, Personal and Pooled.
- App Groups – A logical grouping of applications installed on session hosts in the host pool. An app group can be one of two types, RemoteApp or Desktop.
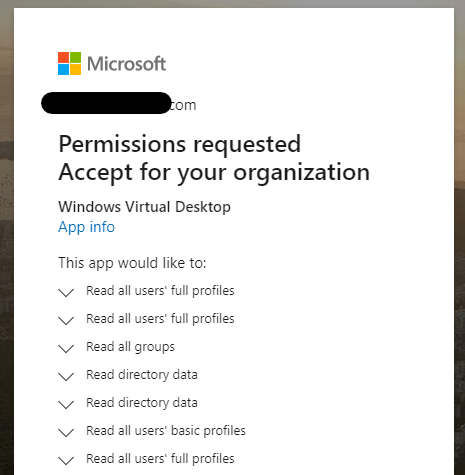
Now it’s time to start configuration and deployment. First, you need to grant WVD access to your Azure AD, you should read the full instructions on doing this and be sure you understand the required permissions and that they are OK within your Governance strategy. You accept two sets of permissions, a server app and a client app.
Once the permissions are accepted, you will see two new enterprise applications created in your tenant.

This is the step I have seen most people stumble on, you need to assign the TenantCreator role to a user within the Windows Virtual Desktop app. It must be a user from that AAD instance. It cannot be a group or a service principal. If you’re using AADDS, my advice is to assign the role to a user who also is a member of AAD DC Administrators. You can then use the same account for your whole deployment.
Now we move onto some Powershell configuration for your WVD tenant. You’ll need to install the module first. Then a couple of commands later has a tenant created for you. Note the tenant name must be globally unique. Also the Add-RdsAccount cmdlet requires login, ensure you use the account that was assigned the TenantCreator role in the previous step.

Now you need to create a Service Principal for use with WVD. This is made simpler with the detailed instructions at the link. Pay special attention to the fact you cannot retrieve the password at a later time, make note of it securely! Complete all of the steps in a single powershell session to avoid any headaches. When the role is assigned, and you’ve signed in as the Service Principal, simply run the following cmdlet to confirm access:
Get-RdsTenantNow we move onto deploying resources. You can deploy your first host pool via the Marketplace. When running through the basics, if you’re using AADDS, ensure you choose the same location for deployment or domain join will fail. Fill in your requirements, I went quite light for mine, single server, shared pool, just one user with access.
When that completes, you will have access to a desktop from the default group. I’m going to change things up a bit and give access to an app group and some basic apps. Full commands required are here and easy to follow. Just remember a user can’t be part of both an app group and desktop group for the same pool.
Once deployed, you can access your resources via browser or the client. I like to test via the browser as it’s quick and simple. But I’ve found it’s an odd URL to find so here it is – https://rdweb.wvd.microsoft.com/webclient – and we can see I have access to my resources!

Next, I want to add my final piece of customisation for this post. FSLogix profiles via Azure Files. There is a straight forward guide to setting up a share on a server here and it works great but who wants to manage a server?
There is a nice comparison table for pros/cons here
| Features | Azure Files | Azure NetApp Files | Storage Spaces Direct |
|---|---|---|---|
| Platform service | Yes, Azure-native solution | Yes, Azure-native solution | No, self-managed |
| Regional availability | All regions | Select regions | All regions |
| Redundancy | Locally redundant/zone-redundant/geo-redundant | Locally redundant | Locally redundant/zone-redundant/geo-redundant |
| Tiers and performance | Standard Premium Up to max 100k IOPS per share with 5 GBps per share at about 3 ms latency | Standard Premium Ultra Up to 320k (16K) IOPS with 4.5 GBps per volume at about 1 ms latency | Standard HDD: up to 500 IOPS per-disk limits Standard SSD: up to 4k IOPS per-disk limits Premium SSD: up to 20k IOPS per-disk limits We recommend Premium disks for Storage Spaces Direct |
| Capacity | 100 TiB per share | 100 TiB per volume, up to 12.5 PiB per subscription | Maximum 32 TiB per disk |
| Required infrastructure | Minimum share size 1 GiB | Minimum capacity pool 4 TiB, min volume size 100 GiB | Two VMs on Azure IaaS (+ Cloud Witness) or at least three VMs without and costs for disks |
| Protocols | SMB 2.1/3. and REST | NFSv3, NFSv4.1 (preview), SMB 3.x/2.x | NFSv3, NFSv4.1, SMB 3.1 |
Now the official doc site doesn’t include a tutorial and there are quite a few steps to configure initially, but thankfully the different sections have been put into a single post by Stefan Georgiev over on the tech community site. I’ve ran through the entire thing and it works exactly as expected.

There is so much more to explore with WVD. I’m going to use this post as a starting point and build from here with more complex configuration as I go. If there is anything you’d like to see, please get in touch!
