How to – Reduce your Azure IaaS Costs

A regular starting point for most people when first using Azure, or any public cloud, is a virtual machine. Depending on your environment, VMs can be one of the most expensive resources. It’s no surprise that this can be a strong negative when considering a move to cloud.

Before anything is deployed, it’s important that you are aware of the tools that Microsoft make available to help you estimate your costs in advance. This can help both understand and avoid unwanted surprises with your bill.

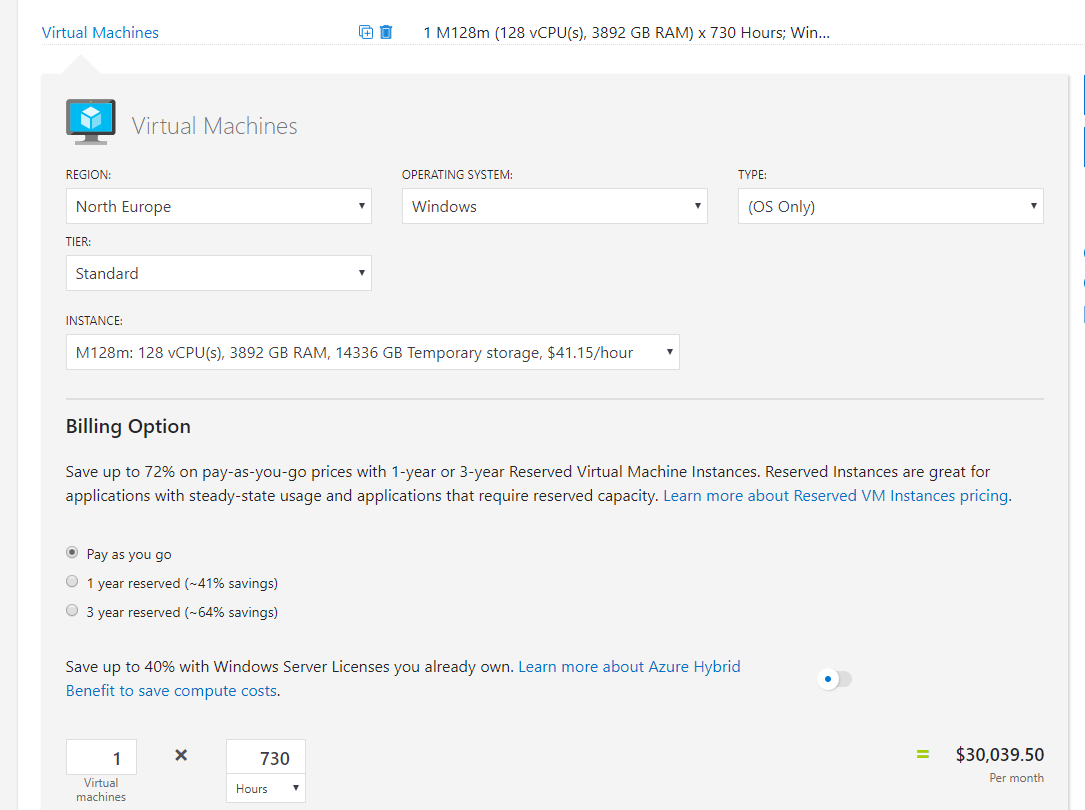
First up is the Azure Pricing Calculator, with a bit of work, you can achieve an acceptably accurate cost estimate for an environment. I normally choose the default settings when it comes to pricing options (such as PAYG) as it gives me the most expensive and therefore safest estimate for a quick quote. If you have access to other consumption offers, ensure you are signed in so you can access their rates.

For this post I’m going to use a single VM estimate to display cost and changes. As it’s a single VM I have chosen a beast – M128m

Once you have your worst case estimate, it’s time to start making some adjustments to get that price down as low as possible. To do this, I recommend the following three options.

  1. Reserved Instances
  2. Automation
  3. Hybrid Benefit

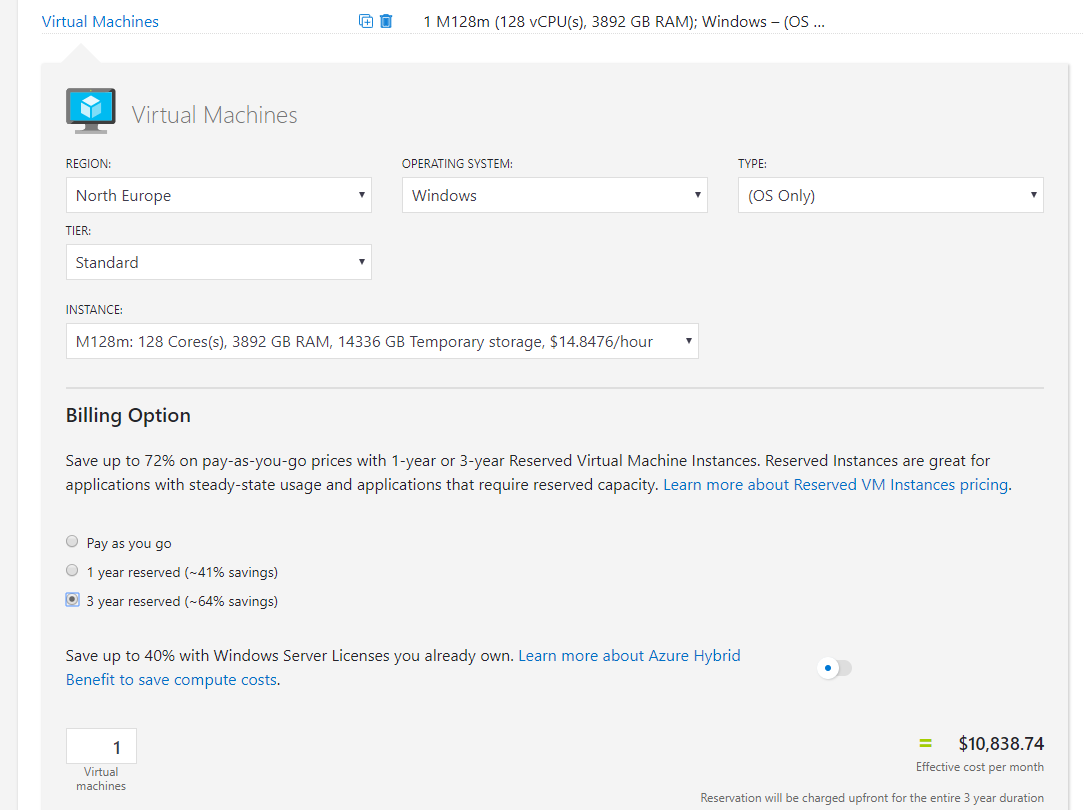
First up, and most straight forward – Reserved Instances. They are a billing object that allows you to save money over a fixed period of time by paying for the usage up-front. From the screen grab you can see the savings can be approx. 64% for a three-year reserved instance. I have an old post that is still valid on RIs over here.

Again, you will pay the entire price up front, but look at the difference it makes to the monthly rate for our beast:

Next, modifying your usage hours using Automation. Now, this doesn’t have to be using Azure Automation and its Start/Stop solution as there are alternative like over on Azure MVP, Gregor Suttie’s blog. Whatever method you choose, update your usage hours in the cost calculator to see your savings, for this post I’m going to first remove weekends (average 8 days a month = 192 hours) and cut the remaining workdays in half (538/2). So instead of 730 hours, we get 269 hours and the appropriate reduction in price to our beast:

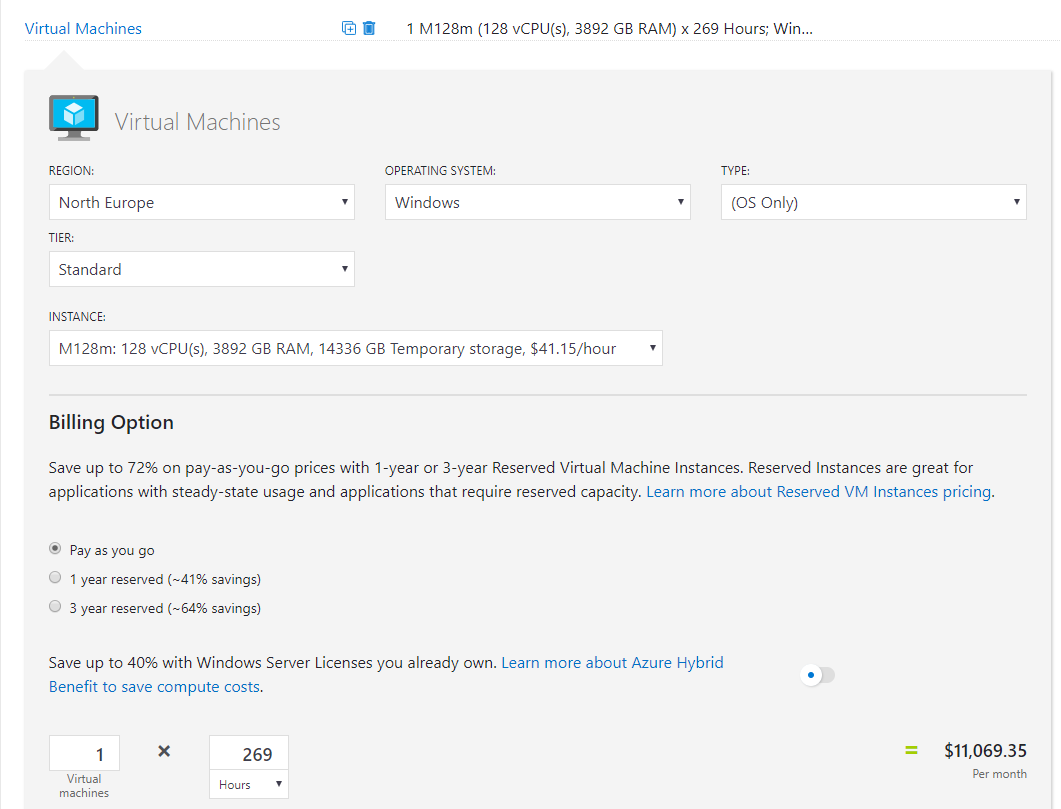
One thing to note at this point, if you’re using Reserved Instances, there is no point in using Automation to save on costs. RIs cover the full usage for the period.

Finally, the simplest to implement but arguably most complex option, Azure Hybrid Benefit. This is a licensing option that allows you to reuse your on-prem licenses in Azure. This is an option that can only be used in Azure and therefore a unique cost saving method. Applying it is simply a tickbox within your VM blade. Microsoft have a calculator to help you work out the licensing side of things, I’d recommend leaning on your LSP for this part as it can be a bit complicated and you need to make sure you’re compliant. You can see the savings below for our beast:

You’re probably already thinking it, can I layer these together and save even more? Absolutely.

Check out the reduction to the price of the beast if we apply AHB and a three year RI:

So what are you waiting for, head over to your Azure tenant and start saving some money on those VMs ASAP. As always, if there are any questions, get in touch!

Azure Sentinel – Where to start?

First announced back in late February, Azure Sentinel is the first cloud native SIEM service from a major provider. SIEM (security information and event management) is a primary component in any security service. Sentinel aims to leverage cloud specific benefits like elastic scale and AI to allow customers detect and respond to security incidents as quickly and efficiently as possible.

The workflow of Azure Sentinel can be broken into four steps:

Azure Sentinel core capabilities

1. Collect

Sentinel allows you to collect data at scale from multiple users, devices, applications and infrastructure, hosted in Azure, on-premises, and even in multiple clouds. This means you can aggregate all security data using industry standard log formatting. With built-in integration, you can enable collection for features such as Office 365 or Azure AD within seconds.

2. Detect

Having all of your data collected to Sentinel allows for more simple analysis and detection at scale than was previously possible. This more efficient triage, and the capability to leverage Microsoft Machine Learning allows you to be more productive, minimise false positives and react to those high accuracy alerts as early as possible.

3. Investigate

Sentinel allows you to visualise and resolve alerts using the same dashboards. Proactively hunting for incidents can be automatic or scripted into a set of queries. Microsoft have provided some to get you started too based on their analysis and response teams.

4. Respond

Continuing the efficiency seen in previous steps, Sentinel allows you to orchestrate and automate responses to incidents. Allowing you to automatically handle repeat and/or known incidents.

So now that you know what it is, the next step is to put it in action and see if it can be of use to you and your client/business. Currently still in preview, Sentinel is free to use, which is always good and allows you to assess the service without any significant financial impact. Bear in mind, you will pay for the Log Analytics workspace which stores the data!

First, you’ll need to enable Sentinel and a workspace, this can be done via the portal and a walkthrough is here. Then, you need to connect some services to start streaming data to Sentinel. As you can see below, there are multiple options and you can choose which logs/data is sent to Sentinel too.

Once your data connector is active, you can make use of the built in dashboards to visualise it. Below is a subsection of the Azure AD sign-in log dashboard, which is available immediately via Sentinel. You can also create your own custom dashboards, there is a guide with samples here.

Now that is being collected and you have visuals, your next step is analysis. The first thing you will need to do is to create Detection Rules. These are essentially Log Analytics queries with alerting parameters wrapped around them. Microsoft offer sample queries on Github which are updated regularly. Alternatively, you can simply write your own to meet your needs.

The results of your Detection Rules are then fed into the Cases section of Sentinel. Here you can triage, investigate and remediate incidents. The cases are created dynamically from the parameters you set for Detection Rules such as severity and entity mapping. As such, be prepared to have to tweak those thresholds and alert patterns a bit. I have Sentinel running within several customer tenants, and am still not 100% happy with my detection rules yet. Always remember to update the status of your case too, in progress, resolved etc.

Finally, you should set up some Playbooks to respond to your alerts. A Playbook is simply a set of procedures that you can run from Azure Sentinel. They help automate and orchestrate your responses to alerts, and you can run them manually or ideally set them up to run automatically in response to certain alerts. They are based on Logic Apps, which means all of the same actions are available via Sentinel. One quick note, there is a charge for Logic Apps and therefore Playbooks, so ensure you understand your costs first.

When creating a Playbook, regardless of it is going to be run automatically by Sentinel or manually by you, you should first define your scenario. My preferred approach here is to come up with “If-This-Then-That” loops and apply them as needed. This is another section that will take some tweaking over time. In my experience, I only run Playbooks manually initially, then start to add automated triggering once I’m happy with the alert and response. Docs have a nice sample alert-response playbook with messaging and actions which is a great place to start.

Another function which I haven’t covered here is Hunting. I haven’t spent enough time with this feature yet to give a detailed opinion but you can read more on it over on Docs.

So, if you haven’t given Sentinel a try yet, I’d recommend you review the quickstarts and deploy in your tenant for one or two of the data sources like Azure AD. While it’s in Preview, it is a great chance to assess it relevant to your tenant and hopefully gain some greater insight and response capability too.

As always, if there any questions or if you have any problems with your Sentinel, get in touch!