Exploring: Microsoft Copilot for Azure

Recently, I was lucky enough to gain access to Microsoft Copilot for Azure as part of a limited preview. For anyone who missed the announcement at Ignite, here is what Microsoft describe it as:

Microsoft Copilot for Azure (preview) is an AI-powered tool to help you do more with Azure. With Microsoft Copilot for Azure (preview), you can gain new insights, discover more benefits of the cloud, and orchestrate across both cloud and edge. Copilot leverages Large Language Models (LLMs), the Azure control plane, and insights about your Azure environment to help you work more efficiently.

So – what does that mean in practice? For me, this means reading the docs, then getting stuck into actually trying elements of this out. To be transparent, I had low expectations for this service. I am not 100% sure whether it is aimed at me, or someone with less Azure experience. I was also conscious that this is the limited preview I am working with, so there will be some oddities.

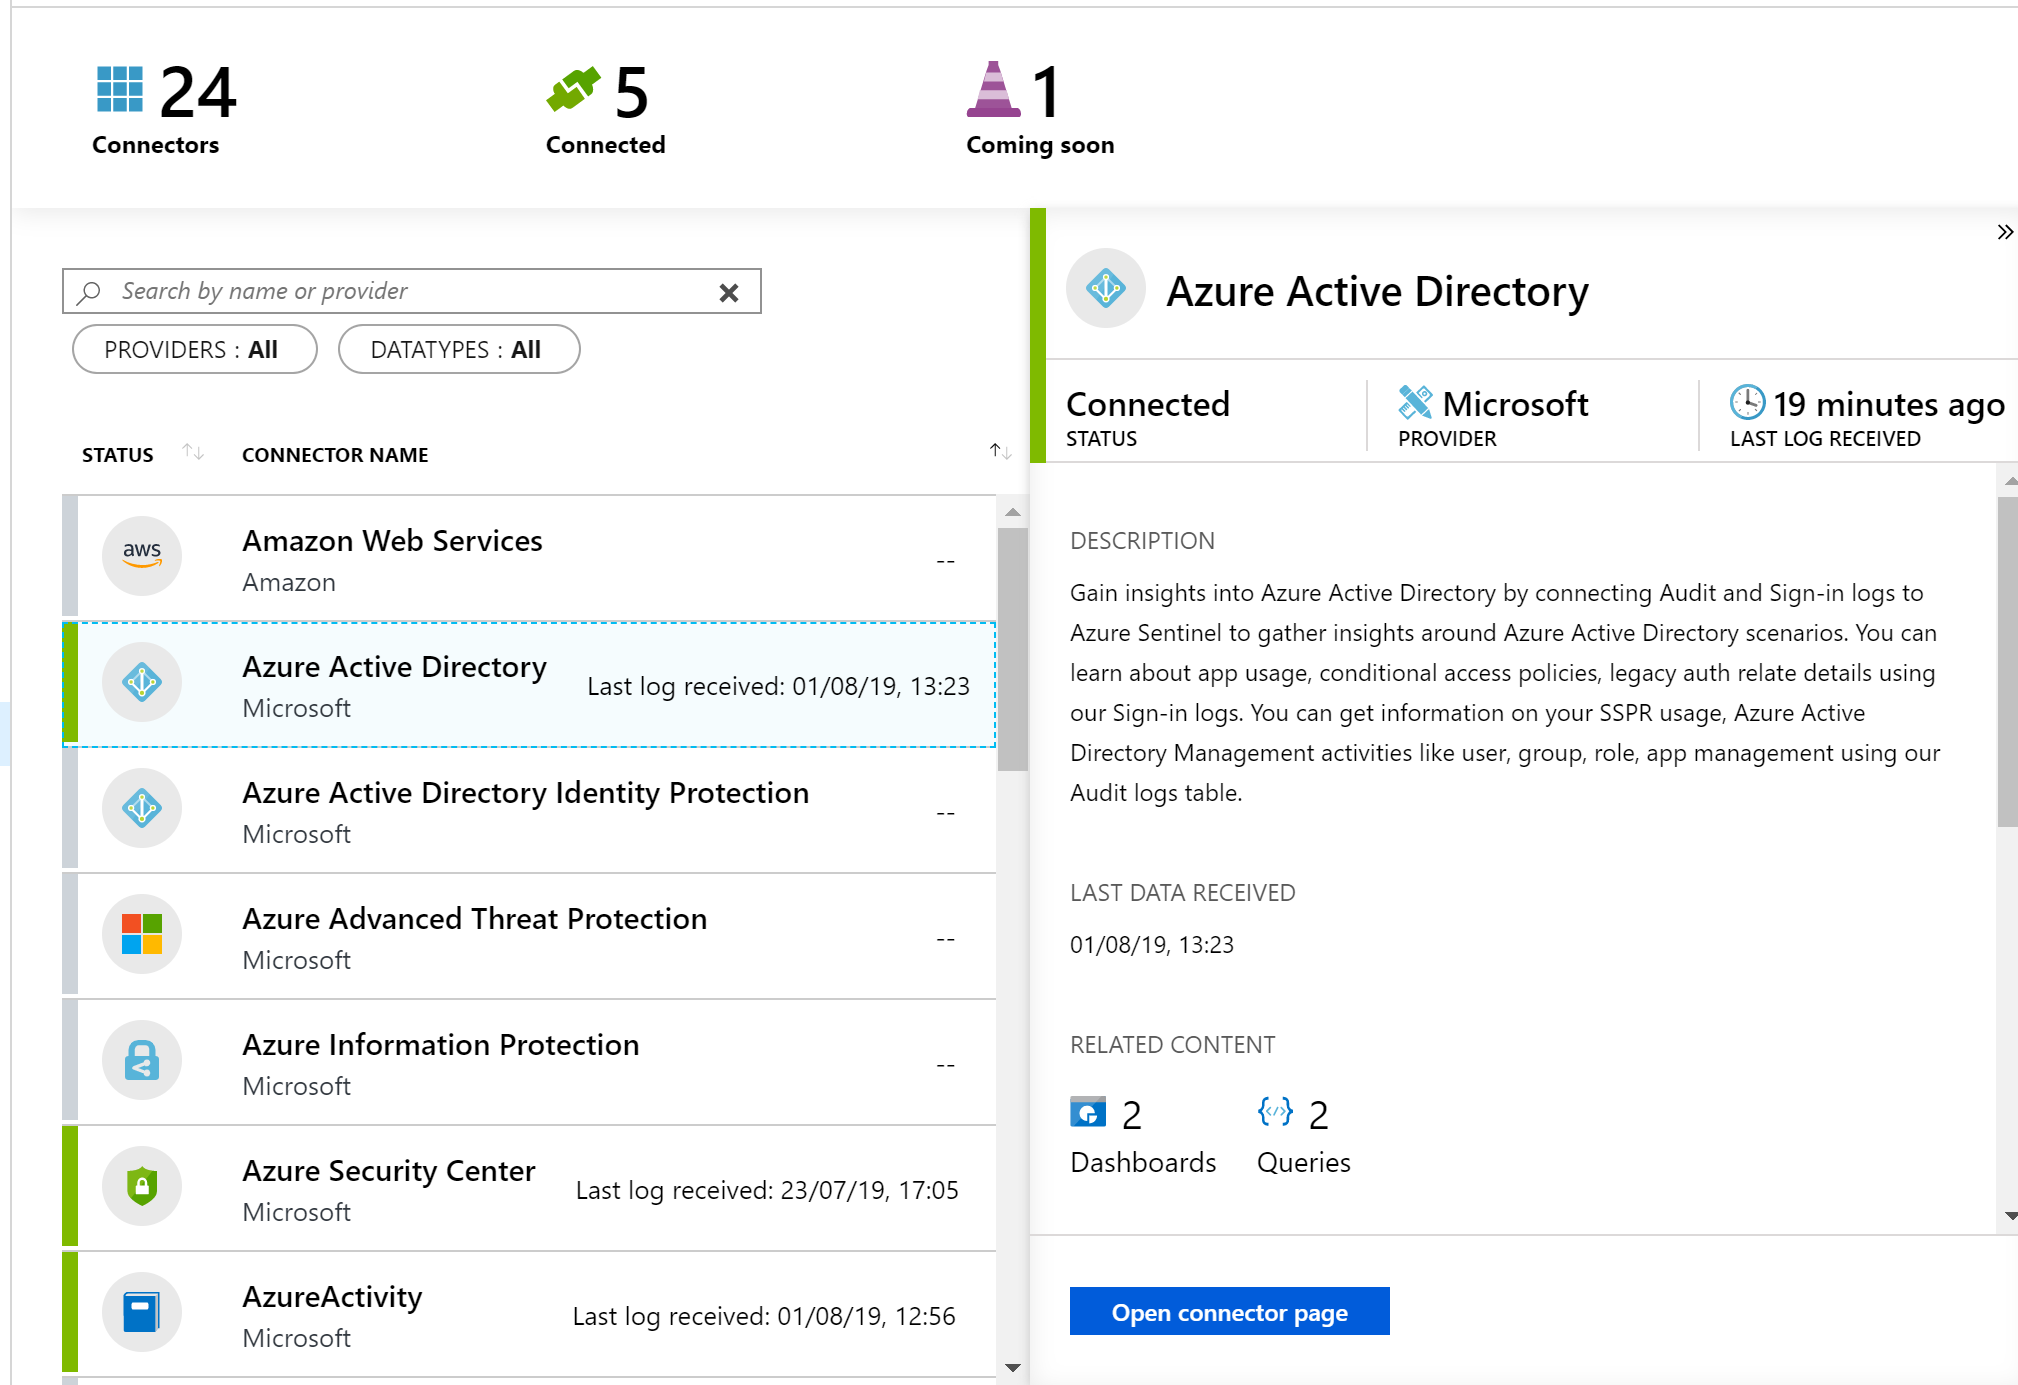
First up, the integration into the Portal UX – I like it. It’s simple, and consistent. As it is a tenant level service, it stays in place as you jump around the Portal from a Subscription to a Resource to Entra ID for example.

Next, what can I use this for that is quicker than me doing this myself? I will be honest, I struggled a bit here. This is for two reasons. One, this is enabled in my MVP tenant, so I have very little Production or day-to-day work to be done. Two, I was looking for something interesting rather than ‘tell me how to build a VM’.

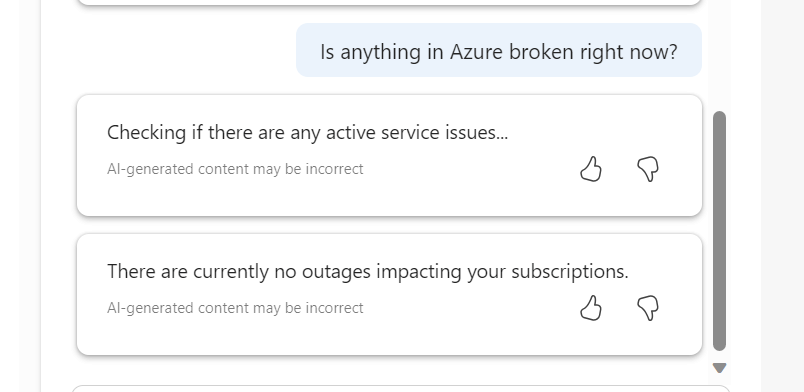
So, I started with a question I know the answer to, but anyone who follows #AzNet knows we are all dying for progress on…

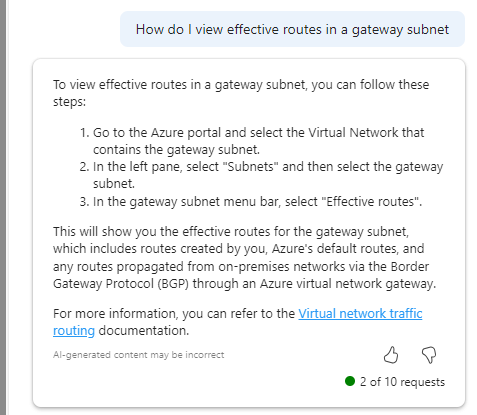
Imagine my surprise with how confident that response is! OH MY GOD I FOUND A THING. Well no, it doesn’t work. And I have no idea what it means in Step 3. If you find out – please let me, Aidan and Karl know, thanks 🙂 But I do like that it attempts to back up its answer with links to documentation.

As you make requests, it dynamically updates the text to tell you what it is ‘thinking’ which I really like.

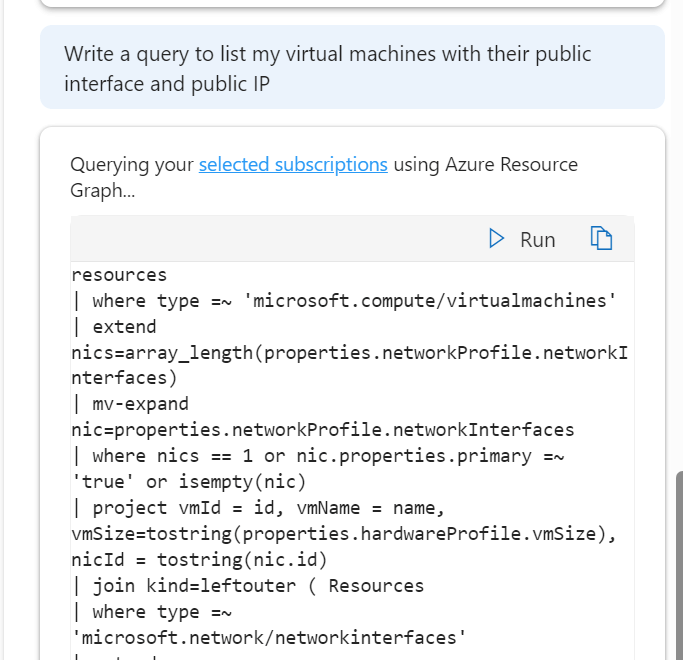
And that ability to write queries, is a real winner for me. saves a lot of time, but you need to be quite specific with the ask and detail, but that’s no real surprise at this stage.

I do like its ability to take quite a non specific question and offer a decent and useful output in response

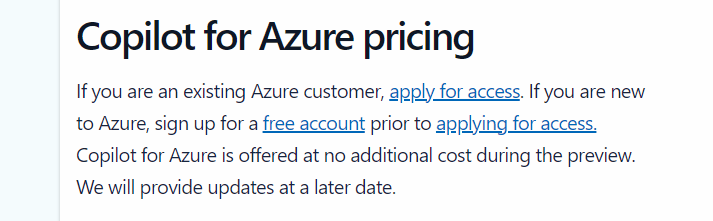
However, I am finding myself trying to find things for it to do. This is OK during preview, where there is no additional cost, however, it’s not clear on what pricing will actually be just yet, vague language on the landing site makes me think this will be charged for

Overall, I think it’s a welcome addition to the AI assistant space from Microsoft. I think those of us working with Azure would feel quite left behind otherwise. But I do think that as the platform is so vast and as each environment is unique, the core use case for different people will vary and that could significantly impact whether this is used widely or not. Having said that, I am looking forward to how this progresses, and more people having access can only mean improvements.

AZ-500 Microsoft Azure Security Technologies – Study Guide

Updated February 2021

Azure has a sole security focused exam, AZ-500 Microsoft Azure Security Technologies. Passing this single exam will allow you to earn a Microsoft Certified: Azure Security Engineer Associate certification.

So, if you’re interested and wondering if you should take this exam? Here is what Microsoft have to say:

Candidates for this exam are Microsoft Azure security engineers who implement security controls, maintain the security posture, manages identity and access, and protects data, applications, and networks. Candidates identify and remediate vulnerabilities by using a variety of security tools, implements threat protection, and responds to security incident escalations. As a Microsoft Azure security engineer, candidates often serve as part of a larger team dedicated to cloud-based management and security and may also secure hybrid environments as part of an end-to-end infrastructure.

Candidates for this exam should have strong skills in scripting and automation, a deep understanding of networking, virtualization, and cloud N-tier architecture, and a strong familiarity with cloud capabilities, Microsoft Azure products and services, and other Microsoft products and services.

Below, I’ve put together a collection of links relevant to the sections highlighted as being part of the skills measured for this exam. As always, these are only guide links, sometimes you need to explore a topic much more deeply if you are not familiar with it.

If you spot something, or have a better link for a topic, get in touch! I will update this post as regularly as possible and always appreciate any feedback.

A good place to start is the Azure Security Documentation page. This site includes most of the key concepts and services covered in this exam, as well as several best practice approaches you should consider.

Manage Identity and Access (30-35%)

Manage Azure Active Directory identities
Configure secure access by using Azure AD
Manage application access
Manage access control

Implement Platform Protection (15-20%)

Implement advanced network security
Configure advanced security for compute

Manage Security Operations (25-30%)

Monitor security by using Azure Monitor
Monitor security by using Azure Security Center
Monitor security by using Azure Sentinel
Configure Security Policies

Secure Data and Applications (20-25%)

Configure security for storage
Configure security for databases
Configure and manage Key Vault

Azure Sentinel – Where to start?

First announced back in late February, Azure Sentinel is the first cloud native SIEM service from a major provider. SIEM (security information and event management) is a primary component in any security service. Sentinel aims to leverage cloud specific benefits like elastic scale and AI to allow customers detect and respond to security incidents as quickly and efficiently as possible.

The workflow of Azure Sentinel can be broken into four steps:

Azure Sentinel core capabilities

1. Collect

Sentinel allows you to collect data at scale from multiple users, devices, applications and infrastructure, hosted in Azure, on-premises, and even in multiple clouds. This means you can aggregate all security data using industry standard log formatting. With built-in integration, you can enable collection for features such as Office 365 or Azure AD within seconds.

2. Detect

Having all of your data collected to Sentinel allows for more simple analysis and detection at scale than was previously possible. This more efficient triage, and the capability to leverage Microsoft Machine Learning allows you to be more productive, minimise false positives and react to those high accuracy alerts as early as possible.

3. Investigate

Sentinel allows you to visualise and resolve alerts using the same dashboards. Proactively hunting for incidents can be automatic or scripted into a set of queries. Microsoft have provided some to get you started too based on their analysis and response teams.

4. Respond

Continuing the efficiency seen in previous steps, Sentinel allows you to orchestrate and automate responses to incidents. Allowing you to automatically handle repeat and/or known incidents.

So now that you know what it is, the next step is to put it in action and see if it can be of use to you and your client/business. Currently still in preview, Sentinel is free to use, which is always good and allows you to assess the service without any significant financial impact. Bear in mind, you will pay for the Log Analytics workspace which stores the data!

First, you’ll need to enable Sentinel and a workspace, this can be done via the portal and a walkthrough is here. Then, you need to connect some services to start streaming data to Sentinel. As you can see below, there are multiple options and you can choose which logs/data is sent to Sentinel too.

Once your data connector is active, you can make use of the built in dashboards to visualise it. Below is a subsection of the Azure AD sign-in log dashboard, which is available immediately via Sentinel. You can also create your own custom dashboards, there is a guide with samples here.

Now that is being collected and you have visuals, your next step is analysis. The first thing you will need to do is to create Detection Rules. These are essentially Log Analytics queries with alerting parameters wrapped around them. Microsoft offer sample queries on Github which are updated regularly. Alternatively, you can simply write your own to meet your needs.

The results of your Detection Rules are then fed into the Cases section of Sentinel. Here you can triage, investigate and remediate incidents. The cases are created dynamically from the parameters you set for Detection Rules such as severity and entity mapping. As such, be prepared to have to tweak those thresholds and alert patterns a bit. I have Sentinel running within several customer tenants, and am still not 100% happy with my detection rules yet. Always remember to update the status of your case too, in progress, resolved etc.

Finally, you should set up some Playbooks to respond to your alerts. A Playbook is simply a set of procedures that you can run from Azure Sentinel. They help automate and orchestrate your responses to alerts, and you can run them manually or ideally set them up to run automatically in response to certain alerts. They are based on Logic Apps, which means all of the same actions are available via Sentinel. One quick note, there is a charge for Logic Apps and therefore Playbooks, so ensure you understand your costs first.

When creating a Playbook, regardless of it is going to be run automatically by Sentinel or manually by you, you should first define your scenario. My preferred approach here is to come up with “If-This-Then-That” loops and apply them as needed. This is another section that will take some tweaking over time. In my experience, I only run Playbooks manually initially, then start to add automated triggering once I’m happy with the alert and response. Docs have a nice sample alert-response playbook with messaging and actions which is a great place to start.

Another function which I haven’t covered here is Hunting. I haven’t spent enough time with this feature yet to give a detailed opinion but you can read more on it over on Docs.

So, if you haven’t given Sentinel a try yet, I’d recommend you review the quickstarts and deploy in your tenant for one or two of the data sources like Azure AD. While it’s in Preview, it is a great chance to assess it relevant to your tenant and hopefully gain some greater insight and response capability too.

As always, if there any questions or if you have any problems with your Sentinel, get in touch!

Azure – Protect My App

If you’ve taken a path to adopt public cloud and part of that adoption is a public facing application, you need to review how you are protecting it within Azure. When your application was on-premises, there was most likely only a single well managed solution to granting external access. In Azure, there are several various solutions available and each carries its own set of functionality and risk.

Rather than try define that entire list, let us look at how best to protect your application, regardless of how you have deployed it. With Azure, these are my three preferred options:

  1. Azure AD Application Proxy
  2. Azure Application Gateway
  3. 3rd Party Network Virtual Appliance

These arguably run from least to most secure. An important tip is to treat each application as unique, because it is. There is not a single best solution for all of your applications and as Azure is a shared model of security it is up to you to protect your data!

Awkward stuff out of the way, let’s look at Application Proxy, we’ve already had a post on setting this up here. The key point with this service is that you do not have your site exposed externally at a network level. Of course, the application itself will be and therefore possibly your server and data, but there is not an open endpoint accepting traffic.

Next is Application Gateway. This is actually a load-balancing solution but you can enable the Web Application Firewall tier easily. This provides protection of your applications from common exploits and vulnerabilities. However, this protection is based on rules from the OWASP core rule set and while it is configurable, this only means you can disable certain rules, not add custom ones. Application Gateway can seamlessly integrate into your environment whether you are running PaaS or IaaS solutions and is economical from a cost perspective. However, that point regarding customisation can often be the deciding factor in choosing our third option instead.

Finally, a 3rd party appliance. Azure offers solutions from the majority of the major providers in this space. Easily deployable from the Azure Marketplace within minutes. Integration options are good but require some work, (See post on routing here) and cost can be a factor to meet required availability levels. But if you need maximum protection and customisation, this is your best option.

Overall, I think there is definitely a solution in Azure that will meet your requirements. Take the time to understand your application, consult with your SMEs and you won’t go wrong!


First Impressions – Azure Firewall Preview

Recently Microsoft announced that a new Azure Firewall service was entering a managed public preview. Azure Firewall is a managed, network security service that protects your Azure Virtual Network resources. It is a fully stateful firewall as a service with built-in high availability and scalability.

firewall-overview.png

The services uses a static public IP meaning that your outbound traffic can be identified by third party services as/if required. Worth nothing, that only outbound rules are active within this preview. Inbound filtering will hopefully be available by GA.

The following capabilities are all available as part of the preview:

  • Stateful firewall as a Service
  • Built-in high availability with unrestricted cloud scalability
  • FQDN filtering
  • Network traffic filtering rules
  • Outbound SNAT support
  • Centrally create, enforce, and log application and network connectivity policies across Azure subscriptions and VNETs
  • Fully integrated with Azure Monitor for logging and analytics

As with all previews it should not be used for production environments, but for testing purposes this is how to register your tenant for deployment.

To enable the Azure Firewall public preview follow the guide here: Enabling the preview

Once enabled, follow this tutorial for a sample implementation: Deployment Tutorial

Now that you’re familiar with the deployment, you should apply to your specific test scenarios. Be wary of some operations that could be limited by applying a default route to your VM. There is an updated FAQ for the service here: Azure Firewall FAQ

Overall, this is a welcome addition to Azure networking. As the preview progresses and more service options are added, especially inbound options, I see this being as common as deploying an NSG in your environment. Combining it with peering and the right set of rule collections for your environment allows for an easily managed, scalable, and most importantly, secure environment within Azure with minimal cost and infrastructure footprint.