

Azure App Services are an excellent way to run all sorts of applications within Azure. Multiple tiers offer several sets of performance and functionality, generally meaning there is something to suit all requirements and budgets.
As these are PaaS there are a few specific network elements to consider and be aware of. One that I have seen become more common is the request to safelist an App Service. This request regularly requires IPs and this is when we start to run into an issue.
First up, your App Service will be assigned quite a few IPs. When you deploy an App Service Plan, it’s placed in a deployment unit, or you might see this referred to as a webspace. Each one of these is assigned a set of outbound IPs.
An example is below:

This generally causes concern with network/security teams as they are hoping to simply allow a small range, maybe a second for DR. Whereas this outbound range is actually the range for all App Service Plans deployed in that deployment unit, not just your App Service.
Next, you might make a change to your App Service that could invoke a change to these IPs. While you cannot simply change the deployment unit you are in, and therefore the IPs we discussed above, there are cases that it can happen
- Delete an app and recreate it in a different resource group (deployment unit may change).
- Delete the last app in a resource group and region combination and recreate it (deployment unit may change).
- Scale your app between the lower tiers (Basic, Standard, and Premium), the PremiumV2, and the PremiumV3 tier (IP addresses may be added to or subtracted from the set).
Obviously the most common here is most likely scaling. And either this, or simply the requirement to avoid sharing a large, shared set justifies the ask.
Thankfully, the answer is relatively straight forward, but there are a few prerequisites. The two elements of configuration required are:
- Regional Vnet Integration
- NAT Gateway
However, vnet integration requires the use of one of the following App Service Plans – Standard, Premium, PremiumV2 and PremiumV3. If you do have one of those plans, or can justify the cost to add the feature, implementation is quite simple and well documented here.
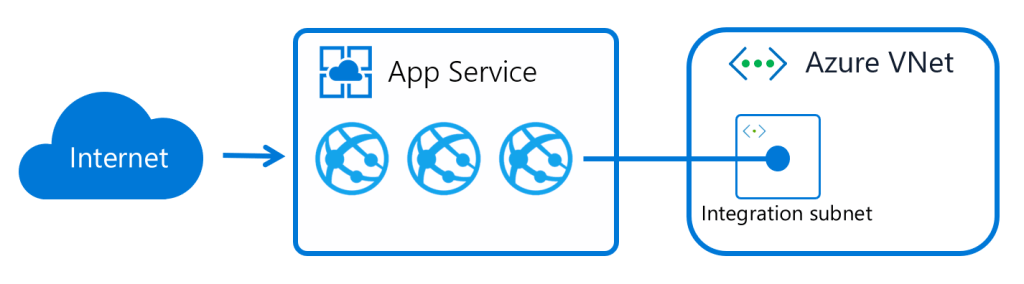
Once integrated, our App Service now has the ability to reach resources within the vnet. However, what we want is to now manipulate the routing and the integration subnet to force traffic outbound via a NAT Gateway. There are a couple of steps, and one item to note before pulling the trigger.

First, the item of note, once this is done, access to Storage Accounts for the app will have to be via Private Endpoint or Service Endpoint, not difficult, just be aware of it.
In terms of configuration, we need to modify routing and enable a NAT Gateway. Modifying the routing is straight forward, it’s a tick box! However, I like to reverse the order here, build the NAT, ensure any ACLs, or allow lists are updated, then tick the box. Don’t forget any Storage Accounts!
For our NAT Gateway, when building, it should be the same region as your app and vnet. Choose either a Public IP or a Prefix, the choice is yours, and when creating, associate it to the subnet our app is integrated with, like the below:

For options on building a NAT Gateway, here is Portal driven and here is a Bicep option.
Now that we have our NAT Gateway and it is associated to our subnet, let’s modify the integration routing. As I said, it is simply a tick box, but it does change the entire flow of traffic, so this is your impact point. On the vnet integration blade, tick “Enabled” for Route All as below:

And that’s it. Your app will now use the outbound IP(s) configured on your NAT Gateway. The additional benefit is that this remains through regardless of what operations you perform on your App Service. Also, NAT Gateway can scale and handle multiple subnets within the same vnet, therefore allowing multiple integrations depending on your specific use case.
