Updated: March 2024 – repo link now updated to new Github structure!
A common requirement for many tenants is to control or restrict the regions in which Azure can be used, this is most commonly done via Azure Policy. Wanting/needing to restrict regions can be for several reasons, below are some of the most common:
- Alignment – Align to local presence for performance etc.
- Governance – Align to compliance, residency and data restriction requirements.
- Features – Not all data regions are created equally – restrict to those with features required.
For anyone who has created a Policy like this in the past, the experience is quite straight forward. Azure provides an out-of-the-box template, you simply have to pick which regions are allowed from a drop down. However, there are actually three policies you should consider for this in my opinion, all are included here.
- Allowed Locations – when a resource deploys, it must align
- Allowed Locations for Resource Groups – when an RG deploys, it must align
- Audit resource location matches resource group location – just nice to have for governance!
So, with multiple policies to deploy, a controlled and accurate solution is to define these Policies via code, in my case, Bicep. How you manage this (i.e. deployment and repo management etc) is not for this blog post, but is achievable with this as your base Policy. Two elements are required for this to work correctly:
- Bicep file to deploy our Policy resources
- Parameters file for policy definitions IDs and regions required.
Item 1 is simple, I’ve included the code below, and will link off to a repo with all of this at the end too.
//params
param locations array
param allowedLocationsDefintion string
param rgLocationsDefinition string
param locationMatchDefinition string

//vars
var allowedLocations = 'Allowed locations'
var rgLocations = 'Allowed locations for resource groups'
var locationMatch = 'Audit resource location matches resource group location'


//deploy policy assignments

resource allowLocations 'Microsoft.Authorization/policyAssignments@2022-06-01' = {
    name: 'allowed-locations'
    properties: {
      displayName: allowedLocations
      policyDefinitionId: allowedLocationsDefintion
      parameters: {
          listOfAllowedLocations: {
            value: locations
          }
        }
      }
    }

    resource allowRGLocations 'Microsoft.Authorization/policyAssignments@2022-06-01' = {
    name: 'rg-locations'
    properties: {
      displayName: rgLocations
      policyDefinitionId: rgLocationsDefinition
      parameters: {
          listOfAllowedLocations: {
            value: locations
          }
        }
      }
    }

    resource resourceLocationMatch 'Microsoft.Authorization/policyAssignments@2022-06-01' = {
    name: 'location-match'
    properties: {
      displayName: locationMatch
      policyDefinitionId: locationMatchDefinition
      }
    }
To explain the above:
- We will pass an array of chosen regions/locations, and the strings of the built-in Policy definitions.
- We use a variable to define the Policy names.
- We deploy a resource object per policy, combining each of these into one Policy deployment.
The only real decision required here is which regions you want to allow. Some pointers from me, always include Global, otherwise some features like Traffic Manager, cannot be deployed. Only include the regions you need now, you can always update later.
How to decide on your regions? That’s probably a whole blog post by itself (adds idea to drafts) but my advice would be choose local, and choose as mature a region as possible. This should offer you the best mix of features, performance, and reliability. Once that is decided, also allow the paired region, so BCDR is possible when needed.
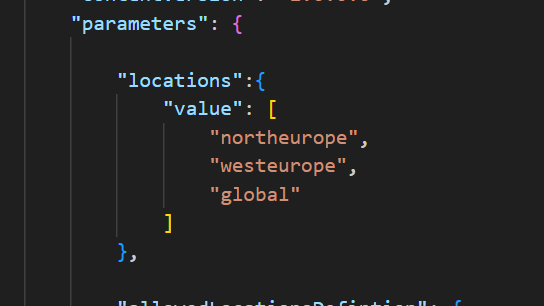
Once you have your list completed, that is now the detail we will use in the parameter file to pass our array of regions for deployment, note these must be in exact format required by ARM.

Now to deploy, simply pick your method! For this post, I am using PowerShell (as I am already logged in) and will complete a Subscription level deployment, as this is a Policy. I will pass both files as command parameters, Azure will do the rest! The below should work for you, and I will include a PS1 file in the repo too for reference, but adjust as per your files, tenant etc.
New-AzSubscriptionDeployment -Name 'az-region-policy-deploy' -Location northeurope -TemplateFile 'C:\folderthatexists\region-restrict-policy.bicep'
-TemplateParameterFile 'C:\folderthatexists\policy.parameters.json'
Once that runs successfully, you can verify all is correct via the Portal. Again, as this is Bicep, you can run this over and over and it will simply update the Policy if there are changes. Meaning all it requires is an update of your location parameters to add or remove regions from being allowed.


And that’s it! As promised, here is a repo with the files for reference. Please note – as always, all code is provided for reference only and should not be used on your environment without full understanding and testing. I cannot take responsibility for your environment and use of code. Please do reach out if you have questions.

